Inground Pool Closing (Winterizing)
Inground Pool Closing (Winterizing)

Step #1
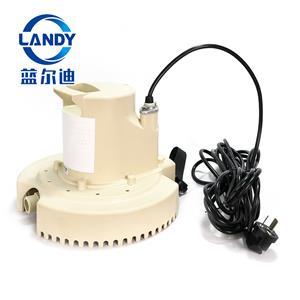
Locate all your winterizing supplies. This should include the cover, the water tubes, the plugs for the skimmers (gizzmos) and return jets and your winterizing chemicals. You will also need an air compressor or a powerful shop vac. You need these items for proper winterization. If you are using the green Gizzmos to plug your skimmers, check them out and make sure that they are not cracked. This is very important when dealing with gizzmos. Gizzmos with holes or cracks will not work !
Step #2
Backwash the filter very well to clean it out. Drain DE filter tanks and leave backwash valve open. On sand filters, unplug the filter drain plug and leave off. Put drain plug with other removed items in the pump basket. Make sure multiport valve has no water in it. Blow it out with a compressor or shop vac if necessary. Please note that it is not recommended to “acid wash” DE filters at the time of the pool closing. This is best to do in the Spring so that you can immediately run pool water through the system. It is not good to use muriatic acid on a DE filter and then just rinse it off and put it away. The acid may degrade the filter parts over the winter.
Step #3
Disconnect your pump and filter. Make sure that pump is totally drained out of any water. Turn pump upside down once to make sure ! Remove any drain plugs from the pump. It is a good idea to store any small plugs or parts in the pump basket. This way you will be able to find them easily in the Spring.
Step #4
If there is a heater, drain it and make sure there is no sitting water inside. Blow it out with a compressor or shop vac. Drain heater totally and remove all drain plugs (if any). Put drain plugs in the pump basket for safe keeping. We do not recommend to remove the heater tray. You can remove it if you want, but you may have trouble putting it back in the Spring. It is not necessary on most units.
Step #5
Unscrew and loosen any quick disconnect fittings or unions at your pump and filter system. Remember, the name of the game is “no freeze cracks”. If the water is all drained out of your pipes and fittings, it cannot freeze and expand and crack.
Step #6
Remove all return jet fittings ( the entire fitting ! ). If you crack a fitting while removing it, don’t panic!! You can get a replacement come Spring. Remove all skimmer baskets. Put fittings and any other items that you remove in one of the skimmer baskets or the pump basket to avoid loss ( this includes the dive board bolts too ).
Step #7
Blow out all return jet pipes using an air compressor or shop vac. Hook up air compressor or shop vac to the return lines at the filter system – or – some people prefer to screw the compressor fitting into the drain plug of the pump. This will give a good seal and allow you to blow out the entire system from that one spot – but this is up to you. Keep the air blowing until the air bubbles start to become visible from the return jets in the pool. Put a plug in the fitting under the water when you see the bubbles blowing at full force. This will mean that 99% of the water is out of the pipe. Make sure plug is in tight ! This is most important.
Step #8
Blow out all skimmer (suction side) pipes in a similar fashion as noted in #7. Put a Gizzmo-type screw in plug in the skimmer when bubbles start to become visible. We know that this is sometimes difficult, but proper gizzmo installation is important. Make sure that you put PTFE tape on the gizzmo threads before installing. This insures a tight seal. If you don not want to use Gizzmo plugs and want to use black rubber-type plugs instead, that is OK as long as there is something in the skimmer to allow for water expansion when it freezes. Usually a closed plastic empty soda-type bottle will work. This is very important ! Do not just plug the skimmer lines and forget about them. Water can easily freeze in a skimmer and crack the plastic. This would be bad !
Step #9
Also, if you have a slide, an auto vac system or a waterfall, you will have to drain and blow out those pipes as well. Remember – we do not recommend putting anti-freeze type products in the pipes. You will not need it if the lines are properly blown out. The anti-freeze can cause a mess in the Spring when you go to start your system and it gets sucked into your filter and blown back into the pool. Try to avoid antifreeze – if possible – by properly evacuating all the water from the pipes.
Step #10
Blow out main drain line (if any). No, you don’t have to dive down and plug the drain pipe. When you see bubbles coming out of the drain, plug the pipe on your end or close the gate valve. This is as much protection as you can give to a main drain line. By doing this you will cause an “air lock” in the line and no more water should enter the pipe from the pool side.
Step #11
Put duct tape on all exposed pipes to prevent anything from getting into them. Use a lot of tape, it’s cheap !
Step #12
Remove rope and floats from pool and put with the rest of the supplies.
Step #13
Remove dive board and ladders. Put in a safe spot – a shed or the garage. Put the pump and filter in the shed or garage as well. You probably are not going to want to move your filter if it is a sand filter. You can leave that outside ! Remember … do not lose dive bolts or ladder bumpers. Put them in the skimmer or pump baskets.
Step #14
Mix any granular winterizing chemicals in a bucket so that they are totally dissolved. Dump mixture into the pool. You want to avoid any undissolved granules from settling on the pool floor and staining the liner. This is very important. If you are using any liquid winterizing chemicals, pour them in the pool as well. Test the pool for pH and Total Alkalinity. Adjust to normal levels using pH PLUS or MINUS and ALKALINITY PLUS. pH should be between 7.2 – 7.6 and Alkalinity between 100-150 ppm. Make sure one of your winterizer chemicals consists of a SHOCK-type product. You want the chlorine level in the pool to be rather high (over 3.0 for wintertime).
Step #15
Water level. This is an area of a little controversy with some people, so we are going to tell you how they close the pools in New York & the Northeast. You do not have to drain any water out of the pool provided that you have properly blown out and plugged all your underground pipes as outlined above and you do not have a pool that has decorative ceramic tiles at the water line. Some people are used to their pool being drained down past the skimmer. This is usually done instead of blowing out the pipes and using gizzmos. Realize that the higher their water level is through the winter, the better it is for the pool cover. Pools that are drained down low cause a lot of undue stress on the pool cover thereby shortening its life – as well as exposing the pool liner to the air and causing it to prematurely dry out.
The use of gizzmos prevents the skimmers from cracking, plugs the pipes and allows the water level to remain high for the cover so that rain water does not cause a lake on top of the pool cover – possibly causing it to fall in. We feel that the way we have stated to close a pool is the proper way. You really only have to drain the water down in a pool if it has tile at the water level because the surface water will freeze and expand over the winter and this could cause those tiles to crack. Aside from this situation, we feel that there is no valid reason to lower the water in the pool. Also, you do not have to remove or “lower” the pool light provided that you keep your water at the normal level.
Step #16
Place the cover on the pool. If there are rips or tears in the cover that are repairable, patch them with either vinyl pool patch (for vinyl covers) or with pool cover patch tape ( for lightweight covers) or with a heavy duty duct-type tape. Remember, if your cover was declared legally dead a few years ago then patching probably is not the right thing to do ! It is probably time to get a new cover. If there are sharp points that extend into the pool, like step units or “ELS”, then it is a good idea to put rags or cardboard between the cover and the points on the pool which extend out. Do this right or the cover may rip on those stress points.
Step #17
If you use water tubes, lay out the water tubes, placing them through loops on cover. Fill tubes with water to approx. 85% and tightly seal all tubes. Do not overfill the tubes – when they freeze you do not want them to expand and split. Tubes should ideally be touching each other end to end. However spacing them one (1) foot apart is OK. If you find that tubes are leaking do not fill them. Replace them with new. It is not a good idea to patch the old tubes unless you absolutely have to. Remember…do not overfill tubes. They should not be totally filled with water. Allow enough slack in the tube for water expansion !